

In 2017, we completed more photo shoots than any other year we’ve been live. We shared over 270 Total Collectible and Action Figure Galleries, totaling well over 350 action figures and collectibles. Between the three main staff members, we spent nearly every day this year photographing and prepping a photo shoot to share with our fans and readers. While I can’t promise that we’ll keep up that blistering pace in 2018, I can promise we’ll continue to bring everyone some fantastic galleries throughout the year. So, if you would like to revisit any of our photo shoots, or feel like you missed a few dozen galleries, you can see the full selection of photo shoots after the jump!
 Sohei Darth Maul – Star Wars Movie Realization Photo Shoot
 NECA Child’s Play Chucky Ultimate Figure – Toyark Photo Shoot
 NECA RoboCop vs Terminator EndoCop and Terminator Dog – Toyark Photo Shoot
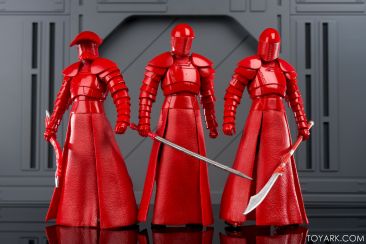
 Elite Praetorian Guard – Star Wars Black Series Amazon Exclusive with Heavy Blade Review
 Star Trek: The Original Series Khan Noonien Singh 1/6 Scale Figure – Toyark Photo Shoot
 QMX Star Trek The Original Series 1/6 Scale Captain’s Chair – Toyark Photo Shoot
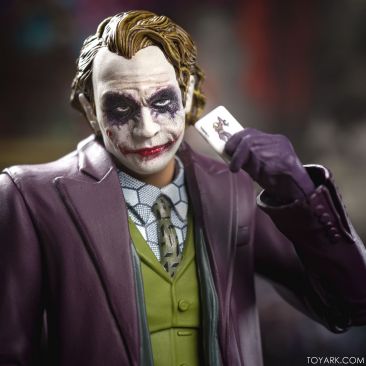
 S.H. Figuarts The Dark Knight Joker Gallery
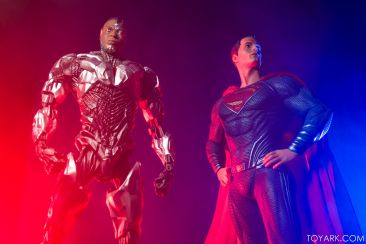 DC Collectibles Justice League Superman and Cyborg Statues Gallery
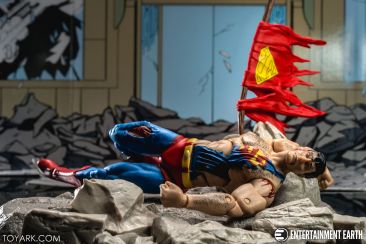 DC Icons Superman Doomsday 2 Pack Photo Review
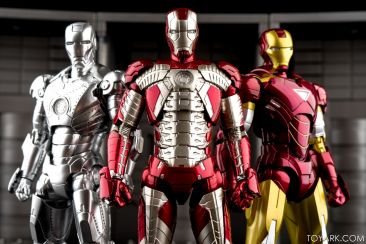 S.H. Figuarts Iron Man Mk. V with Hall of Armor Gallery
 Eaglemoss Glow in the Dark Big Chap Alien Statue – Toyark Photo Shoot
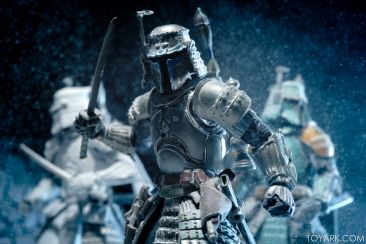 Star Wars Movie Realization Jango Fett Gallery
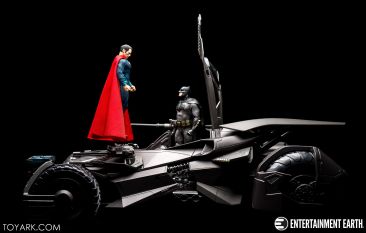
 Mattel 1/10 Scale Justice League RC Batmobile Photo Review
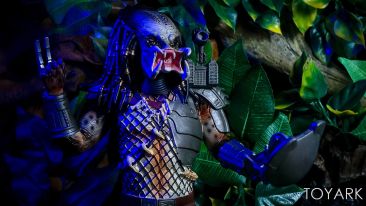 Eaglemoss Jungle Hunter Predator Mega Special Statue – Toyark Photo Shoot
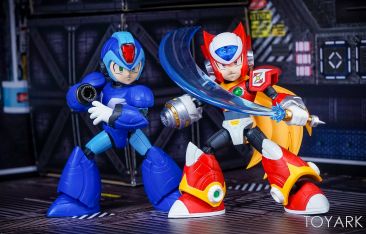
 Mega Man X NXEDGE STYLE X and Zero Figures – Toyark Photo Shoot
 S.H. Figuarts Dragonball Super SSG Goku Photo Review
 S.H. Figuarts Dragonball Z Shenron Photo Review
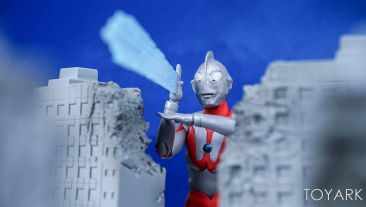 SH Figuarts Ultraman A-Type – Toyark Photo Shoot
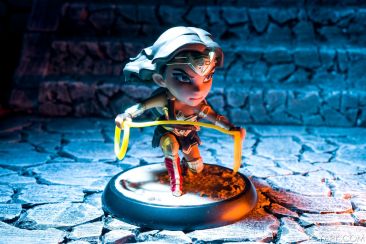 Justice League Wonder Woman QMX Q-Fig Gallery
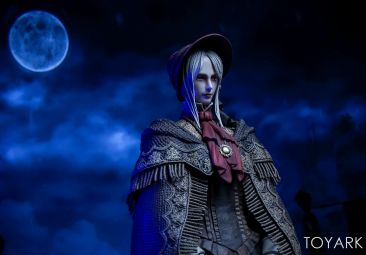
 Bloodborne – The Doll 1/6 Scale Statue by Gecco – Toyark Photo Shoot
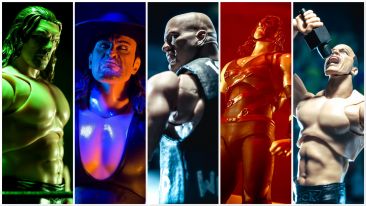 S.H. Figuarts WWE Figures (First 5) Mega Review
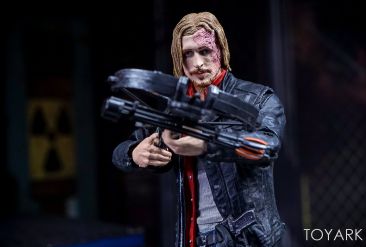
 McFarlane Toys The Walking Dead Dwight 7-Inch Scale Figure – Toyark Photo Shoot
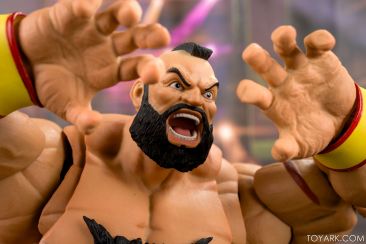 Storm Collectibles Street Fighter Zangief Photo Review
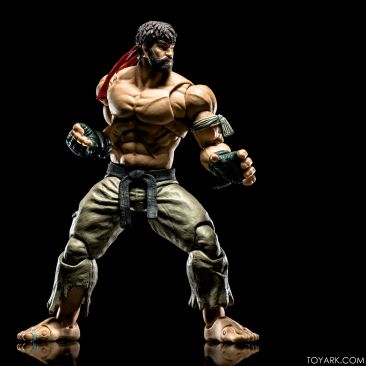 Storm Collectibles Street Fighter Hot Ryu Photo Review
 Storm Collectibles Street Fighter Ken Photo Reveiw
 Eaglemoss Alien Space Jockey Statue – Toyark Photo Shoot
 Gecco Dark Souls 3 Siegmeyer of Catarina 1/6 Scale Statue – Toyark Photo Shoot
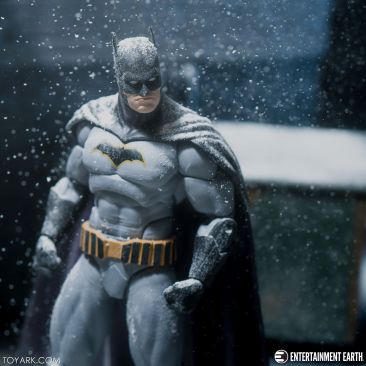 DC Icons Rebirth Batman Photo Review
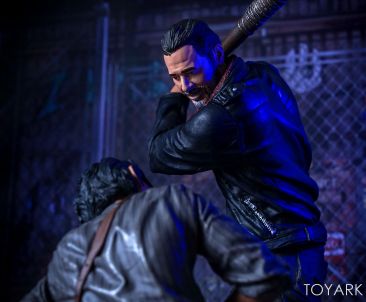
 McFarlane Toys The Walking Dead 10-Inch Scale Deluxe Negan – Toyark Photo Shoot
 McFarlane Toys Labyrinth Jareth the Goblin King Figure – Toyark Photo Shoot
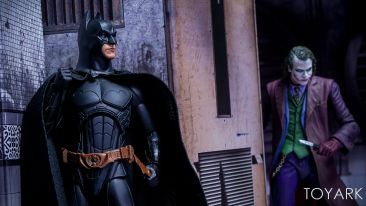 Extreme Sets Asylum Pop-Up Diorama – Toyark Photo Shoot
 Red Orc Detailed Look – Boss Fight Studio Vitruvian H.A.C.K.S. Series 2 Exclusive
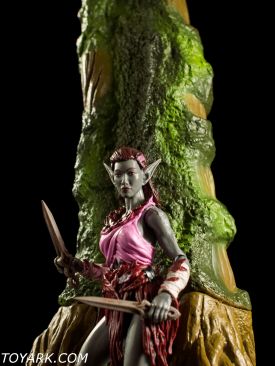
 Sakura Elven Assassin, Cerisier Photo Shoot
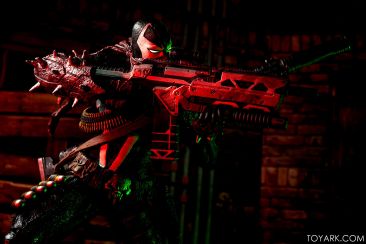 Commando Spawn – Regular and Scorched Earth Variant In-Hand Gallery
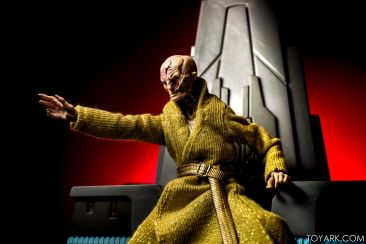 Star Wars Supreme Leader Snoke with Throne Black Series Gallery
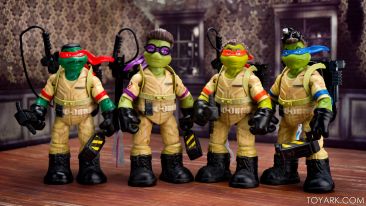 TMNT x Ghostbusters Figures from Playmates Photo Review
 S.H. Figuarts Kinnikuman – Random Photo Shoot
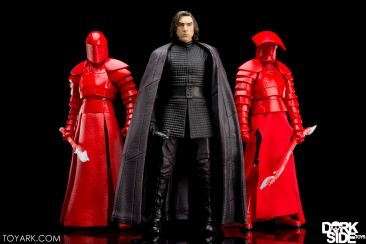 Elite Praetorian Guard – Star Wars Black Series TLJ Photo Review
 NECA Retro Mego Style Child’s Play Chucky Figure – Toyark Photo Shoot
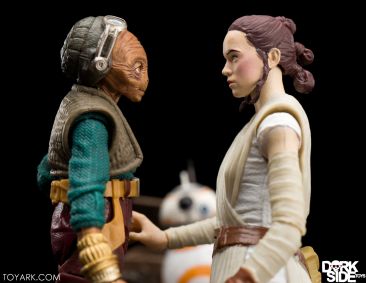
 Maz Kanata – Star Wars Black Series Photo Review
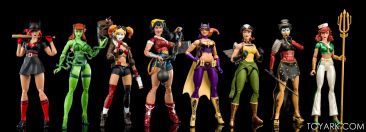
 DC Collectibles Bombshells Designer Series Wave 2 In-Hand Photo Review
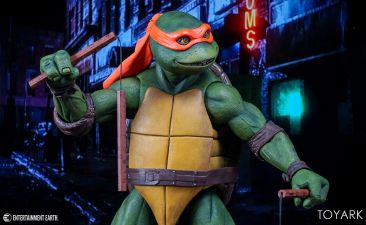
 NECA Teenage Mutant Ninja Turtles 1990 Michelangelo 1/4 Scale Figure – Toyark Gallery
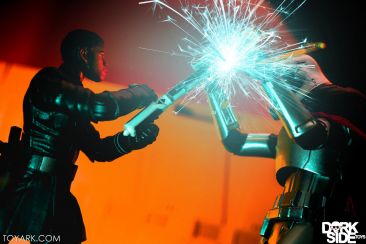 Finn, Poe, Leia – TLJ Black Series Photo Review
 Star Trek: The Next Generation Captain Picard 1/6 Scale Figure by QMX – Toyark Photo Shoot
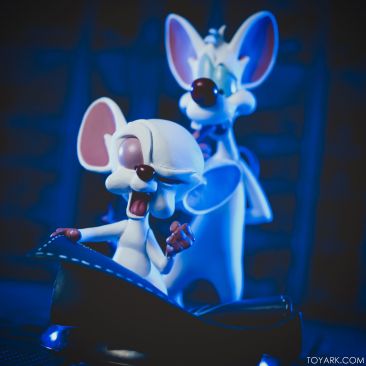 QMX Pinky and the Brain Q-Fig Photo Review
 S.H. Figuarts Super Saiyan 3 Goku (2017) Photo Review
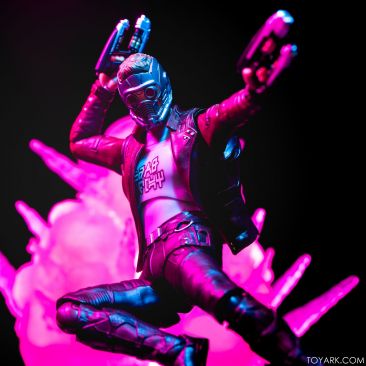 S.H. Figuarts Star Lord with Explosion Set Photo Review
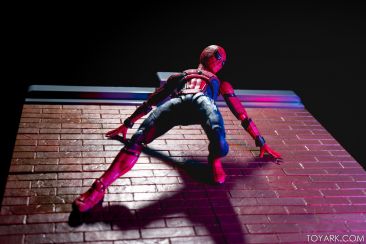 S.H. Figuarts Homecoming Spider-Man with Act Wall Photo Review
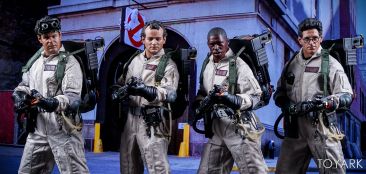
 Blitzway Ghostbusters 1/6 Scale Figures – Toyark Exclusive First Look Photo shoot
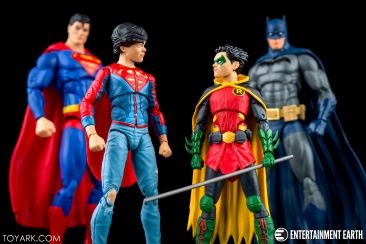 DC Icons Super Sons 2 Pack Photo Review
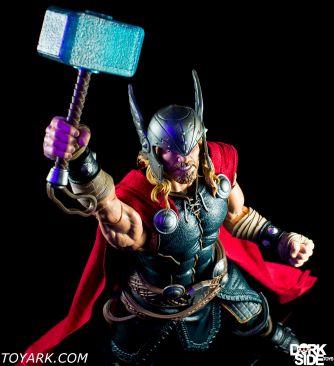
 Avengers Thor Marvel Legends 12″ Photo Shoot
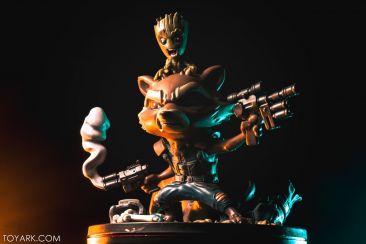 QMX Q-Fig Rocket and Groot Photo Gallery
 Gotham Select Series 4 In-Hand Photo Review
 NECA Aliens Series 12 – Toyark Photo Shoot
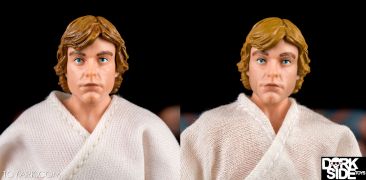
 Luke with X-34 Landspeeder Retail Version – Star Wars Black Series Vehicles Photo Review
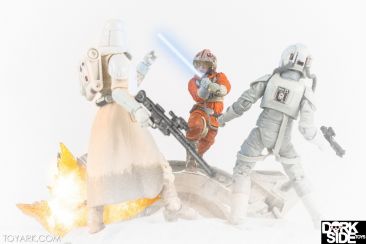 Luke Skywalker on Hoth Star Wars Black Series Centerpiece Photo Review
 Valerian and the City of a Thousand Planets 7-Inch Scale Figures by NECA – Toyark First Look Photo Shoot
 Guardians of Evil Exclusive Pack – Star Wars Black Series In Hand Gallery
 Scavenger Rey & Speeder – Star Wars Black Series Photo Review
 Darth Vader Tantive IV Star Wars Black Series Centerpiece Photo Review
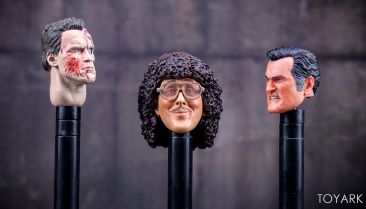
 NECA Action Figure Head Stands – Toyark Photo Shoot
 NECA White and Nerdy Weird Al Yankovic 8-Inch Scale Mego Style Figure – Toyark Photo Shoot
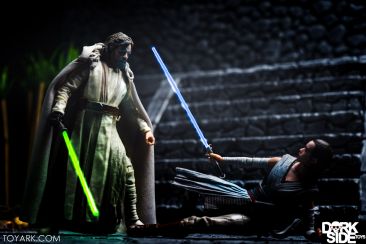 The Last Jedi Wave 1 – Star Wars Black Series Round Up Gallery
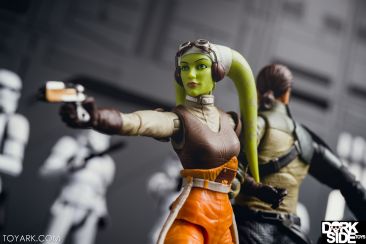 Hera Syndulla – Star Wars Rebels Black Series Photo Review
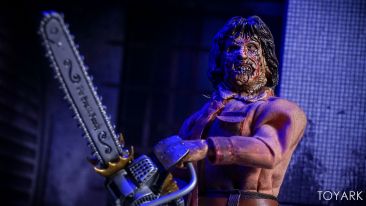 NECA Texas Chainsaw Massacre 3 Leatherface 8-Inch Scale Figure – Toyark Photo Shoot
 Kylo Ren – The Last Jedi Star Wars Black Series Photo Review
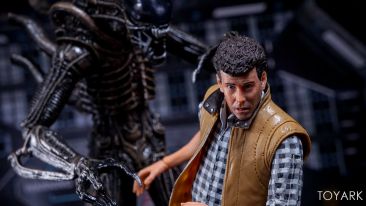 NECA Aliens Hadley’s Hope – Carter Burke and Concept Alien Warrior 2-Pack – Toyark Photo Shoot
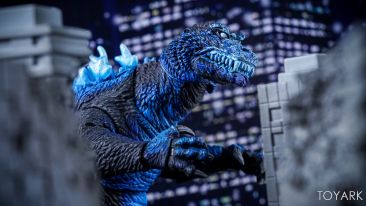 NECA Atomic Blast Godzilla 2001 Figure – Toyark Photo Shoot
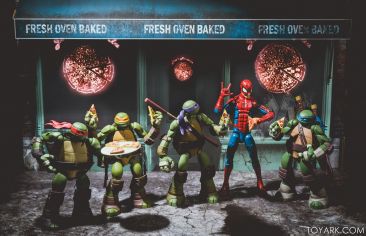 Extreme Sets The Building 2 Pop Up Photo Review
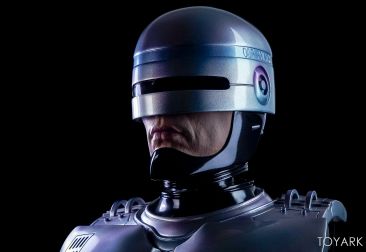
 Chronicle Collectibles Robocop 1/2 Scale Bust – Toyark Photo Shoot
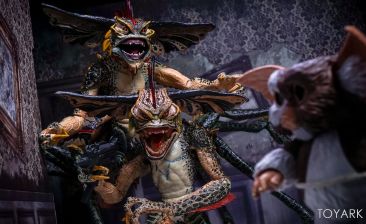
 NECA Gremlins Mohawk Figure – Toyark First Look Photo Shoot
 S.H. Figuarts Iron Man Mk. 2 with Hall of Armor
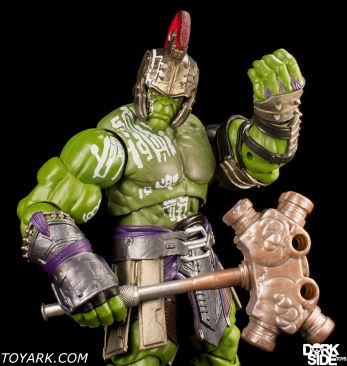
 Marvel Legends Gladiator Hulk BAF Thor Ragnarok Photo Shoot
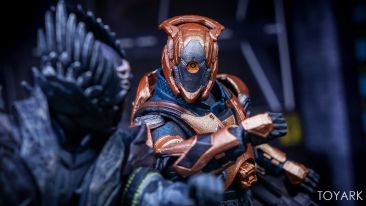 McFarlane Destiny 7-Inch Scale Figures – Toyark Photo Shoot
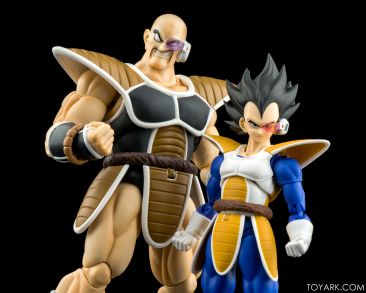
 Nappa – S.H. Figuarts Dragonball Z Photo Review
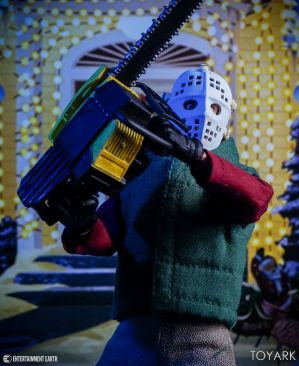
 NECA National Lampoon’s Christmas Vacation Chainsaw Clark Griswold – Toyark Photo Shoot
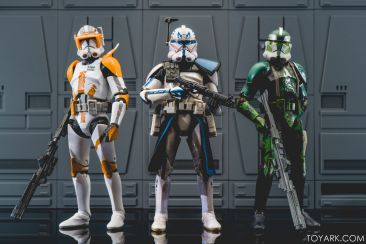 Captain Rex – Star Wars Black Series Hascon Exclusive Gallery
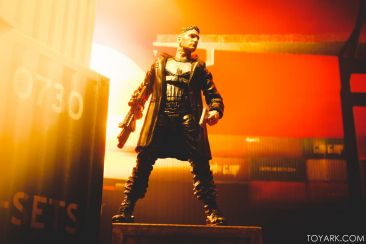 Extreme Sets Animated Port Pop Up Diorama Gallery
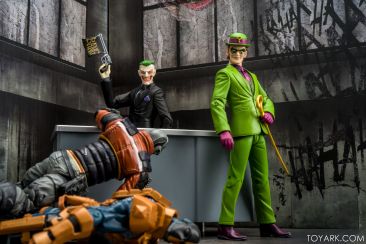 Extreme Sets Display Pack 003 Gallery
 Storm Collectibles Mortal Kombat Noob Saibot – Toyark Photo Shoot
 Kidrobot Madballs Horror and Sci-Fi Series – Toyark Photo Shoot
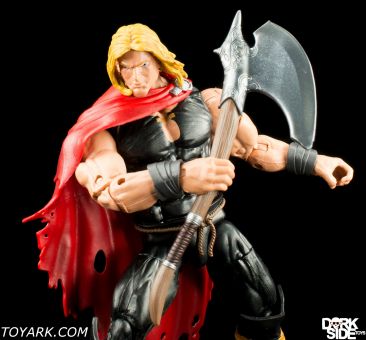
 Marvel Legends Odinson Thor Ragnarok Photo Shoot
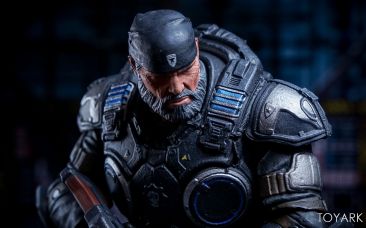
 McFarlane Toys Gears of War 4 Marcus Fenix Figure – Toyark Photo Shoot
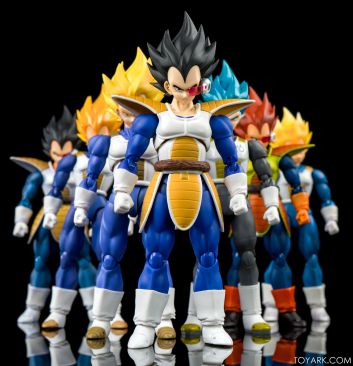
 Saiyan Saga Vegeta 2017 Dragonball Z S.H. Figuarts Gallery
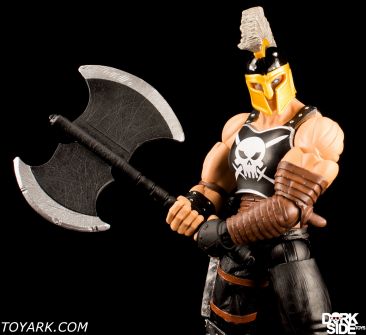
 Marvel Legends Ares Thor Ragnarok Photo Shoot
 McFarlane Toys The Walking Dead Glenn and Negan Deluxe Set – Toyark Photo Shoot
 Mass Effect Andromeda Sara Ryder 7″ Scale Figure – Toyark Photo Shoot
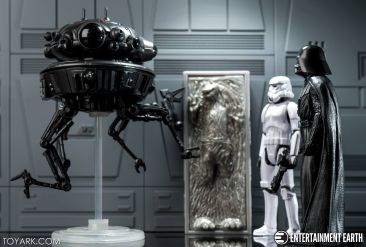 Star Wars Imperial Probe Droid with Darth Vader 2 Pack
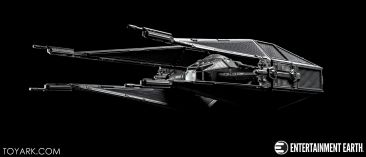 Star Wars The Last Jedi 3.75 Vehicles #ForceFriday
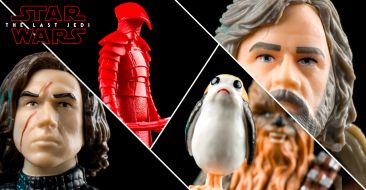 Hasbro Star Wars The Last Jedi 3.75 In Hand HD Mega Gallery #ForceFriday
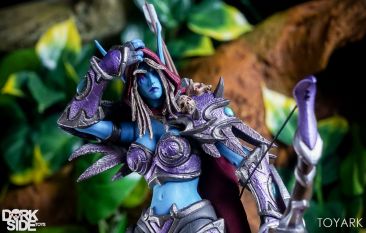 NECA Heroes of the Storm Sylvanas Figure – Toyark Photo Shoot
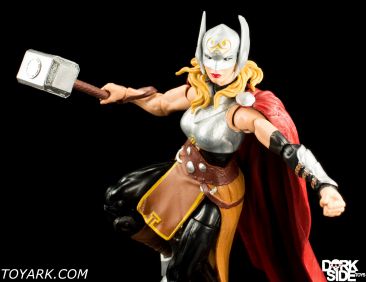
 Marvel Legends Thor Jane Foster Thor Ragnarok Photo Shoot
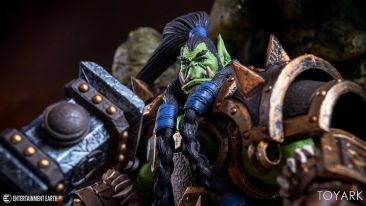 NECA Heroes of the Storm Thrall Figure – Toyark Photo Shoot
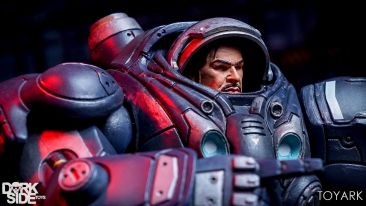 NECA Heroes of the Storm Jim Raynor Figure – Toyark Photo Shoot
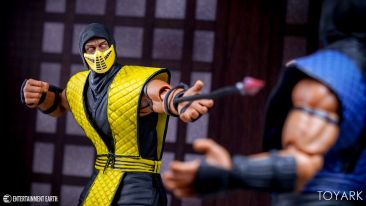 Storm Collectibles Mortal Kombat Scorpion – Toyark Photo Shoot
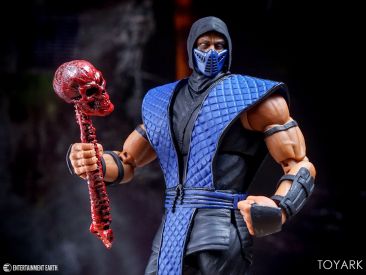
 Storm Collectibles Mortal Kombat Sub-Zero – Toyark Photo Shoot
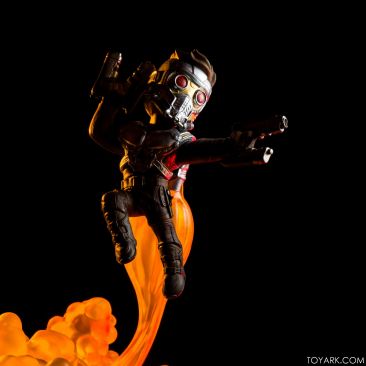 QMX Q-Fig FX Star Lord Photo Review
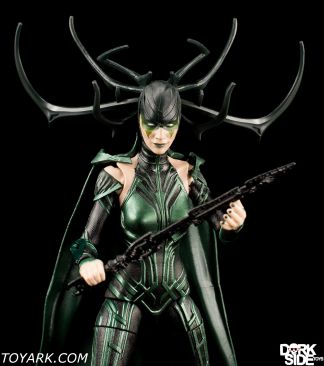
 Marvel Legends Hela Thor Ragnarok Photo Shoot
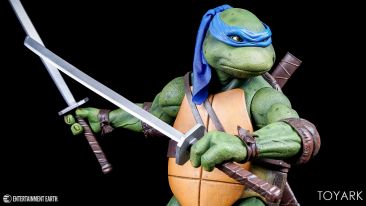 NECA Teenage Mutant Ninja Turtles 1990 Leonardo 1/4 Scale Figure – Toyark Gallery
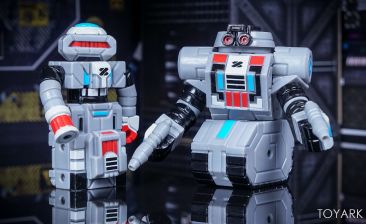 Toyfinity Robo Force and Mordles August 2017 Releases – Toyark Gallery
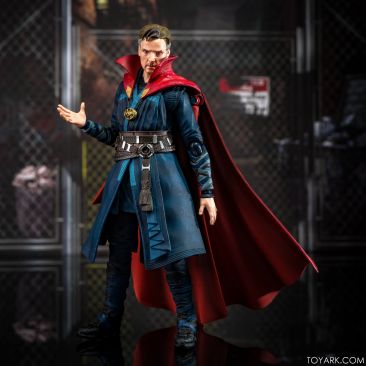 S.H. Figuarts Marvel Dr. Strange Photo Review
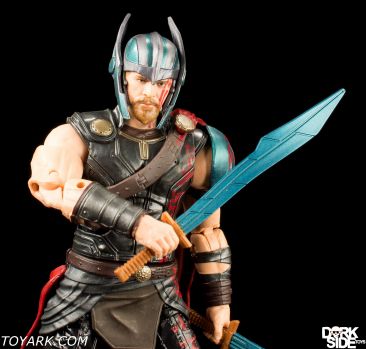
 Marvel Legends Thor Ragnarok Photo Shoot
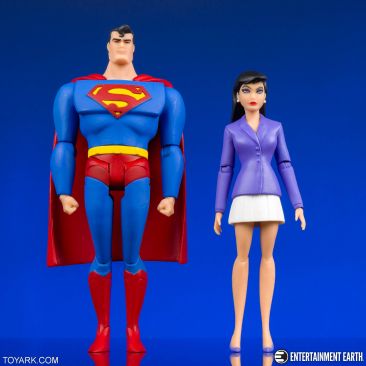 Animated Series Superman and Lois Lane 2 Pack Photo Review
 Marvel Legends Man-Thing BAF Photo Shoot
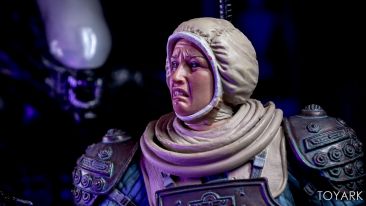 NECA Aliens Series 11 – Toyark Photo Shoot
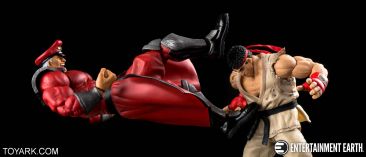 Storm Collectibles M. Bison Figure Review
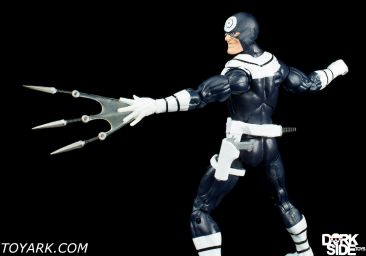
 Marvel Legends Bullseye Photo Shoot
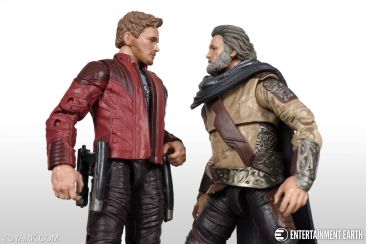 Star Lord and Ego Marvel Legends 2 Pack
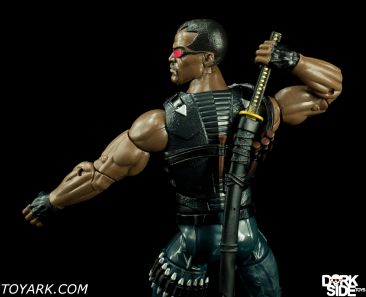
 Marvel Legends Blade Photo Shoot
 Star Wars Black Series The Last Jedi Luke & Rey SDCC 2 Pack Gallery
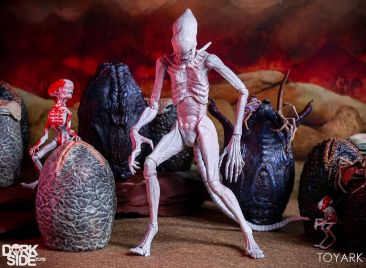
 NECA Alien: Covenant Assortment – Toyark Photo Shoot
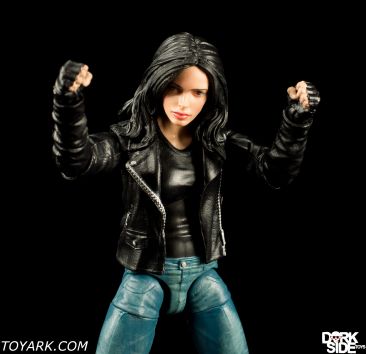
 Marvel Legends Netflix Jessica Jones Photo Shoot
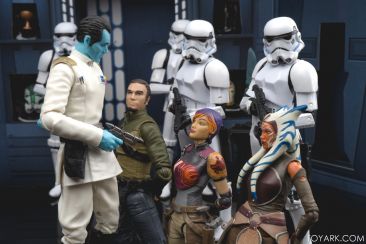 Star Wars Black Series Grand Admiral Thrawn SDCC Box Set Gallery
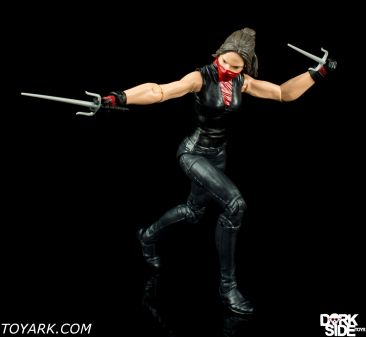
 Marvel Legends Netflix Elektra Photo Shoot
 Star Wars Black Series Luke & Landspeeder SDCC Exclusive Gallery
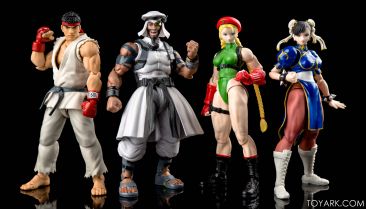 Early Look – S.H. Figuarts Street Fighter V Cammy and Rashid
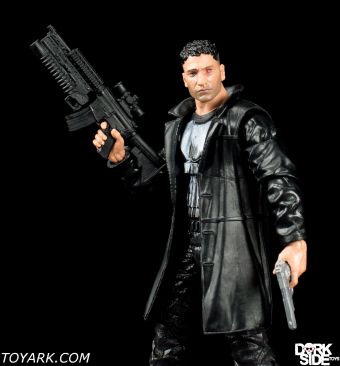
 Marvel Legends Netflix The Punisher Photo Shoot
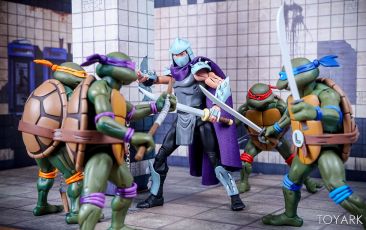
 NECA Teenage Mutant Ninja Turtles SDCC 2017 Exclusive Box Set – Toyark Photo Shoot
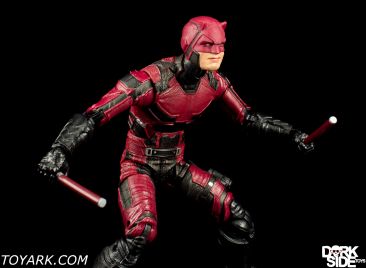 Marvel Legends Netflix Daredevil Photo Shoot
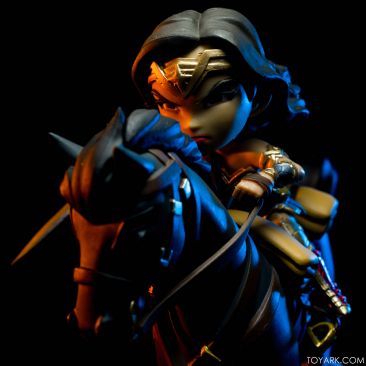 QMX Q-Fig Batman Catwoman and Wonder Woman Photo Review
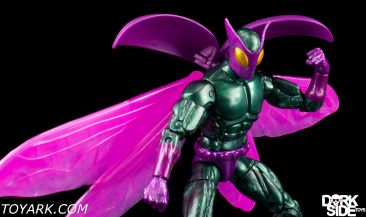 Spider-Man Homecoming Marvel Legends Beetle With Vulture Photo Shoots
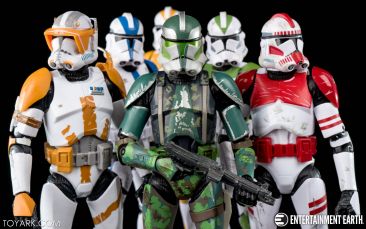
 Star Wars Black Series Commander Gree Photo Shoot
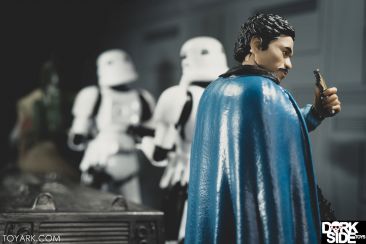 Star Wars Black Series Lando Calrissian Photo Gallery
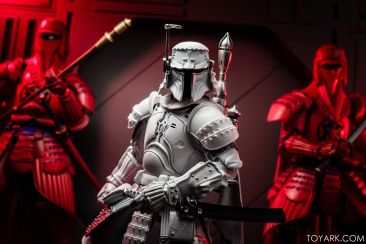 Early Look – SDCC Movie Realization Prototype Boba Fett In-Hand Gallery
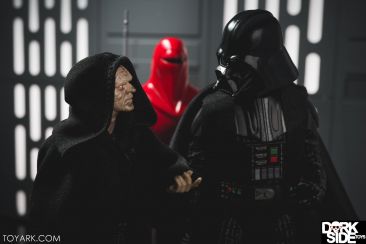 Star Wars Black Series Royal Guard Photo Gallery
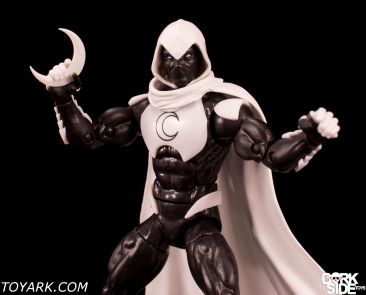
 Spider-Man Homecoming Marvel Legends Moon Knight Photo Shoot
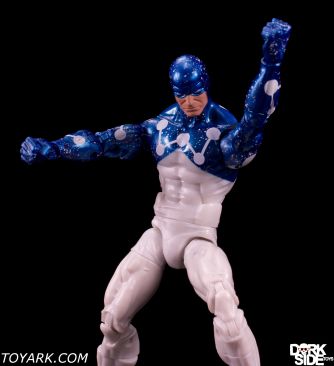 Spider-Man Homecoming Marvel Legends Cosmic Spider-Man Photo Shoot
 Dark Souls 3 – 1/6 Scale Souls of Cinder Statue by Gecco – Toyark Photo Shoot
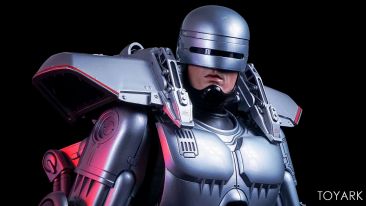 Enterbay HD Masterpiece 1/4 Scale Robocop 3 Figure – Toyark Photo Shoot
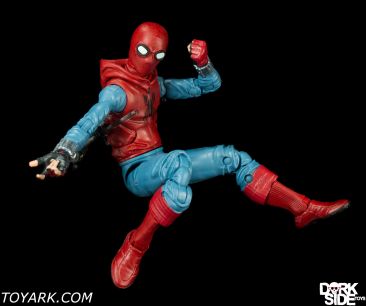
 Spider-Man Homecoming Marvel Legends Spider-Man Photo Shoot
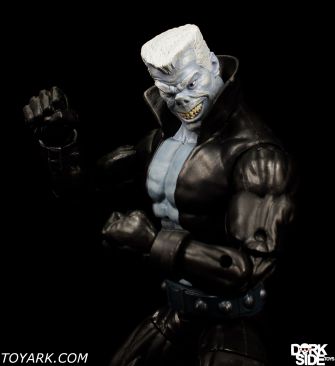
 Spider-Man Homecoming Marvel Legends Tombstone Photo Shoot
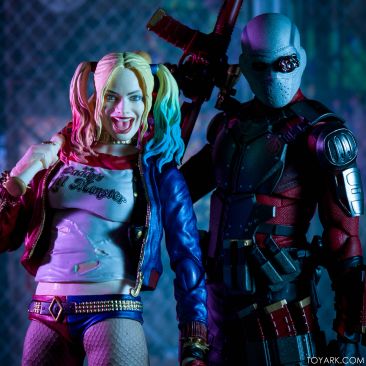 Deadshot – S.H. Figuarts Suicide Squad Photo Review
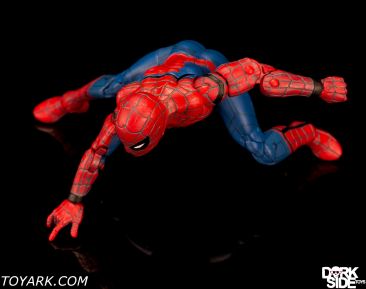
 Spider-Man Homecoming Marvel Legends Spider-Man Photo Shoot
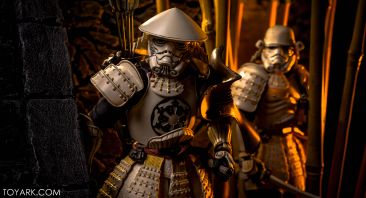
 Yumiashigaru Stormtrooper Star Wars Movie Realization Photo Review
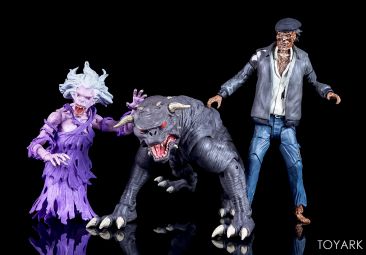 Ghostbusters Select Series 5 and Rooftop Dio – Toyark Photo Shoot
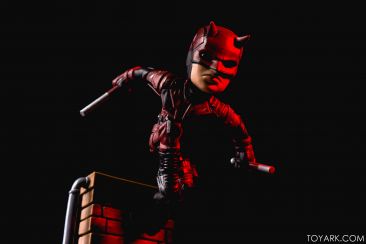 QMx Q-Figs – Netflix Daredevil, Iron Man, and Supergirl Photo Review
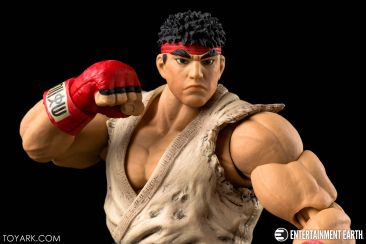 Storm Collectibles Street Fighter Ryu Photo Reveiw
 Friday The 13th Part 4: The Final Chapter – Ultimate Jason Voorhees – Toyark Photo Shoot
 Space Ghost – One:12 Entertainment Earth Glow in the Dark Exclusive Photo Review
 Rocky 40th Anniversary Series 2 Rocky Balboa and Ivan Drago – Toyark Photo Shoot
 Rocky 40th Anniversary Series 2 Apollo Creed and Ivan Drago – Toyark Photo Shoot
 First Look – Boss Fight Studio Series 2 Fantasy Blasted Land Orc NJCC 2017 Exclusive
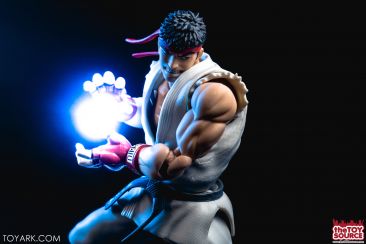 Ryu – S.H. Figuarts Street Fighter Photo Review
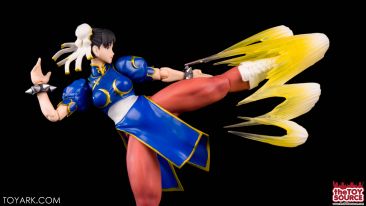 S.H. Figuarts Street Fighter Chun-Li Photo Review
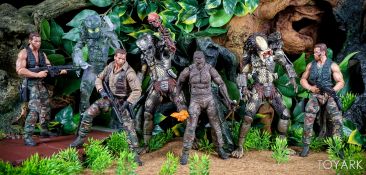 NECA Predator 30th Anniversary Figures – Toyark Photo Shoot
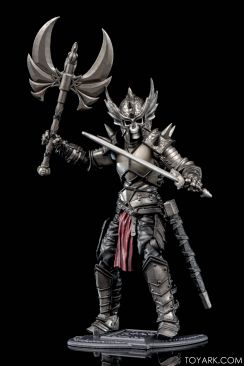
 First Look – Boss Fight Studio Series 2 Fantasy Wave 2
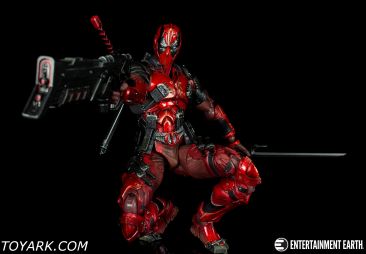
 Marvel Universe Deadpool Variant Play Arts Kai Photo Shoot
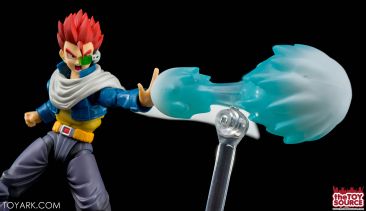
 Xenoverse Time Patroller – S.H. Figuarts Dragonball Z Photo Review
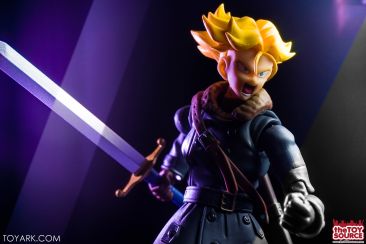 Xenoverse Trunks – S.H. Figuarts Dragonball Z Photo Review
 McFarlane Toys The Walking Dead Heroes 3-Pack – Toyark Photo Shoot
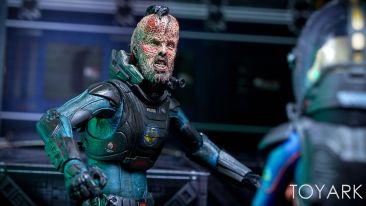 Advanced Look: Prometheus The Lost Wave by NECA – Toyark Photo Shoot
 Jawa, Death Squad Commander, Sand People – SWB6 40th Anniversary Wave 2 Photo Review
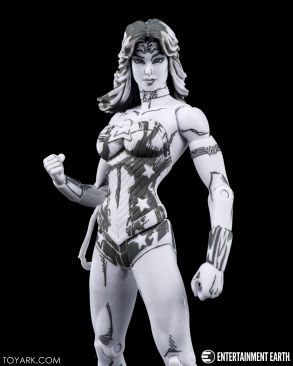
 Wonder Woman Day – Blueline Wonder Woman Photo Review!
 NECA Terminator 2: Judgement Day 3D – T-800 Figure – Toyark Photo Shoot
 NECA Preacher Series 1 – Jesse Custer and Cassidy – Toyark Photo Shoot
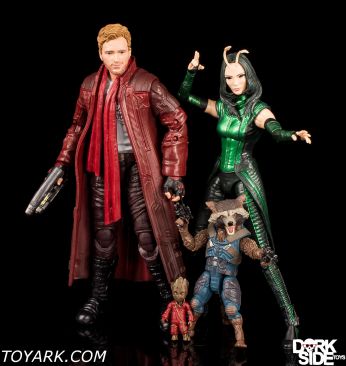
 Marvel Legends Guardians of the Galaxy: Vol. 2 Mantis BAF Photo Shoot
 The Walking Dead – Negan and Bloody Negan 7-Inch Figures – Toyark Photo Shoot
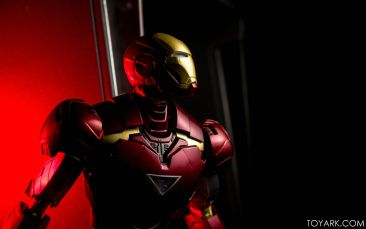 S.H. Figuarts Iron Man Mk 6 With Hall of Armor Photo Review
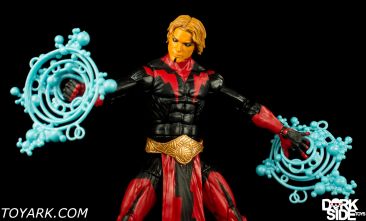 Marvel Legends Guardians of the Galaxy: Vol. 2 Adam Warlock Photo Shoot
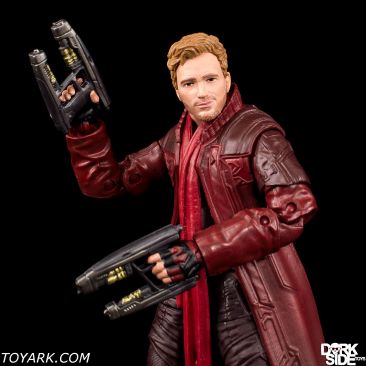 Marvel Legends Guardians of the Galaxy: Vol. 2 Star-Lord Photo Shoot
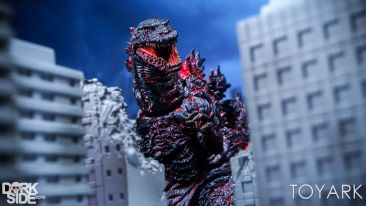 NECA Shin Godzilla 12-Inch Head-To-Tail Figure – Toyark Photo Shoot
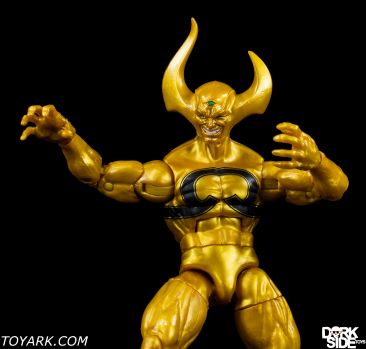 Marvel Legends Guardians of the Galaxy Vol 2 Ex Nihilo Photo Shoot
 Hero Collector Mega Special Big Chap Alien Statue – Toyark Photo Shoot
 Marvel Legends Guardians of the Galaxy Vol 2 Nebula Photo Shoot
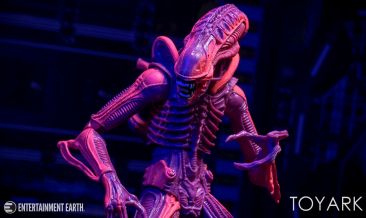
 NECA Aliens Arcade Video Game Appearance Alien Warrior – Toyark Photo Shoot
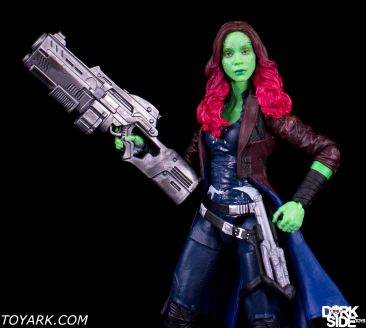
 Marvel Legends Guardians of the Galaxy Vol 2 Gamora Photo Shoot
 The Walking Dead – Lucille Role Play Replica – Toyark Photo Shoot
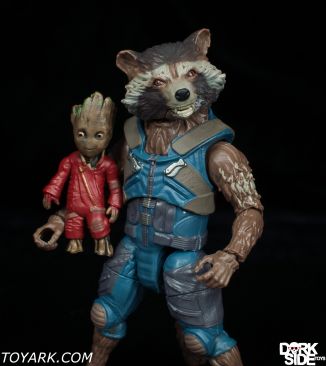
 Marvel Legends Guardians of the Galaxy Vol 2 Rocket Raccoon Photo Shoot
 S.H. Figuarts The Dark Knight Batman – Early In-Hand First Look!
 NECA Ultimate Jungle Hunter Predator – Toyark Photo Shoot
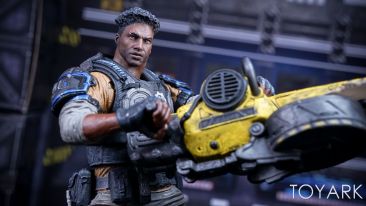 McFarlane Color Tops – Gears of War Del Walker 7-Inch Figure – Toyark Photo Shoot
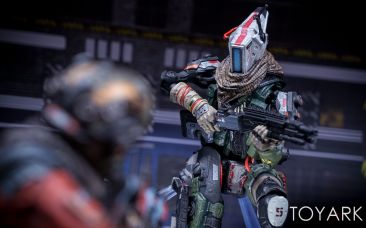 Titanfall 2 – McFarlane Color Tops Collection Jester – Toyark Photo Shoot
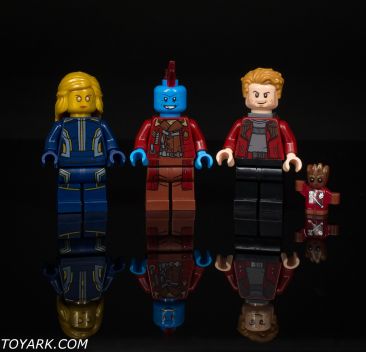
 Guardians of the Galaxy Vol. 2 LEGO 76080 Ayesha’s Revenge Photo Shoot
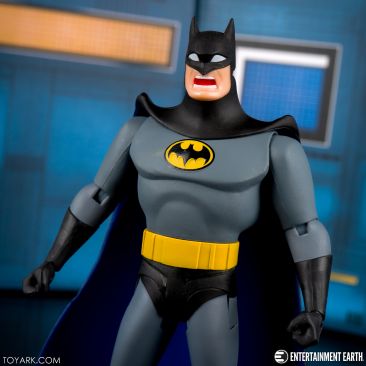 Batman Animated Series Expression Pack Photo Review
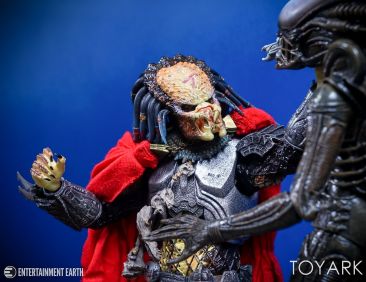 Predator Series 17 Elder Predator – Toyark Photo Shoot
 Amanda Conner Designer Series Harley Quinn Photo Review
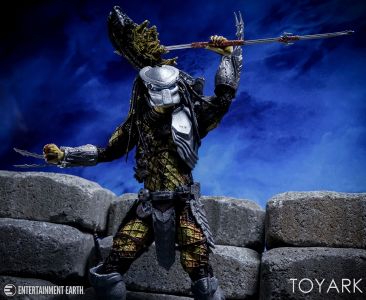 Predator Series 17 Youngblood Predator – Toyark Photo Shoot
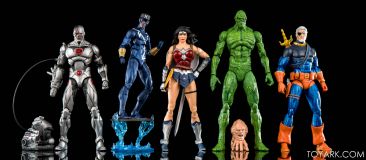 DC Icons Wave 5 Photo Review
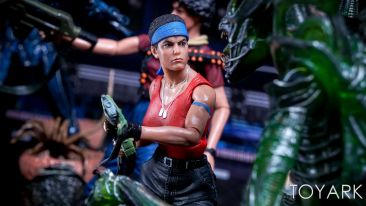 Alien Day Space Marine Vasquez Figure – Toyark Photo Shoot
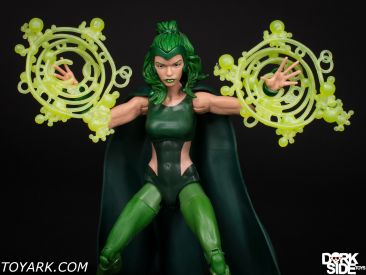 Marvel Legends X-Men Wave Polaris Photo Shoot
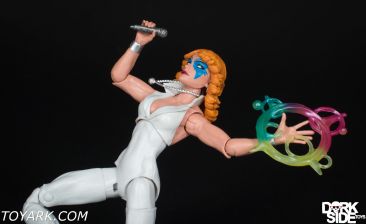 Marvel Legends X-Men Wave Dazzler Photo Shoot
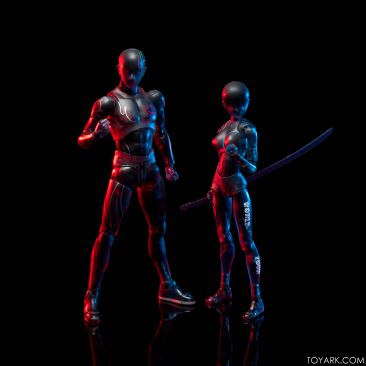 S.H. Figuarts Body Chan and Body Kun World Tour Exclusives First Look
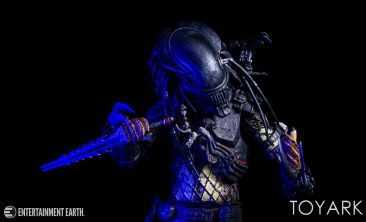 Predator Series 17 Serpent Hunter Predator – Toyark Photo Shoot
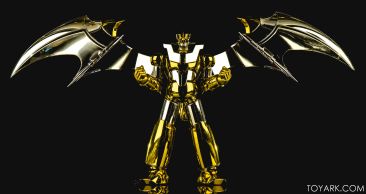
 Shin Mazinger Z Gold Version Tamashii Nations World Tour Exclusive First Look
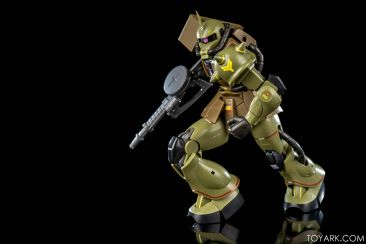 Robot Spirits MS-06 Zaku II Real Color Version – Tamashii World Tour Exclusive First Look
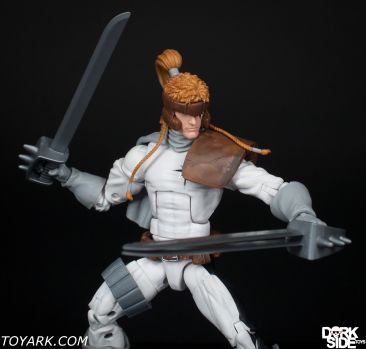 Marvel Legends X-Men Wave Shatterstar Photo Shoot
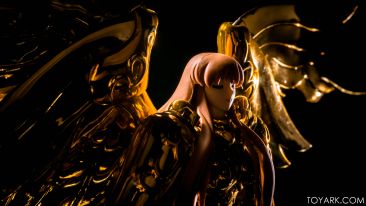 Tamashii Nations World Tour – Saint Cloth Myth Exclusives First Look
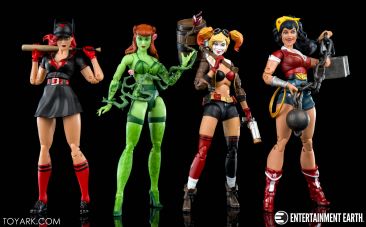
 DC Collectibles DC Bombshells Wave 1 Photo Review
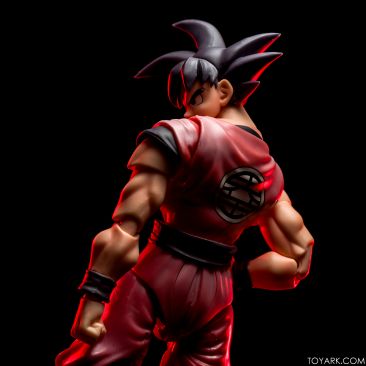 S.H. Figuarts Kaiohken Goku Exclusive In-Hand First Look!
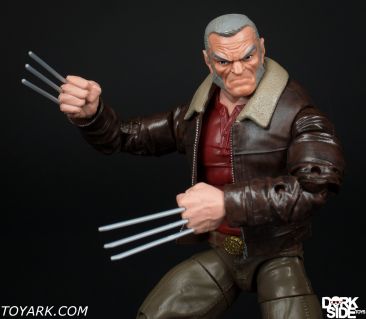
 Marvel Legends X-Men Wave Old Man Logan Photo Shoot
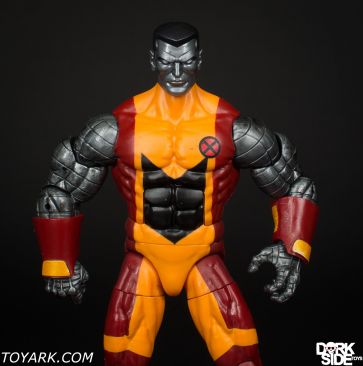
 Marvel Legends X-Men Wave Colossus Photo Shoot
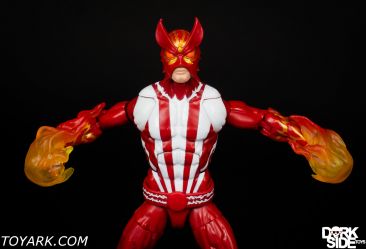
 Marvel Legends X-Men Wave Sunfire Photo Shoot
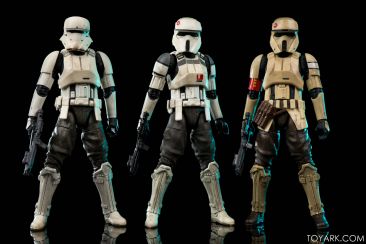 AT-ACT Driver – Star Wars Black Series Photo Review
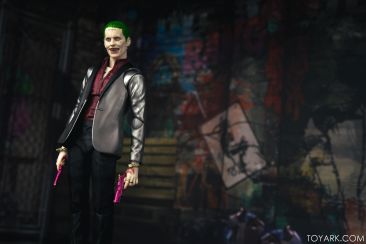 S.H. Figuarts Suicide Squad Joker Photo Review
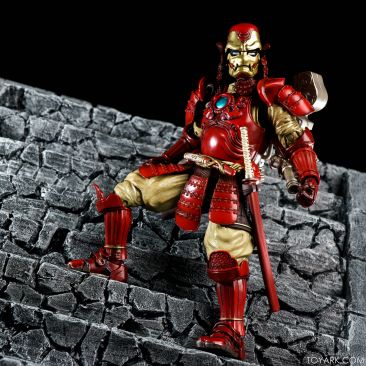 Koutetsu Samurai Iron Man Mk 3 – Manga Realization Photo Review
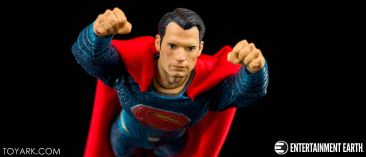 Superman – One:12 Batman v Superman Photo Review
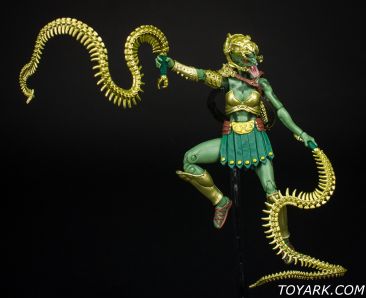
 Atelis Warrior Altered Amazon Boss Fight Studio Kokomo Toys Exclusive
 Darth Vader Legacy Pack Star Wars Black Series 40th Anniversary Photo Review
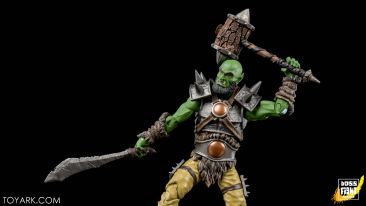 Orc Conqueror Reveal – Boss Fight Studio Vitruvian H.A.C.K.S. Series 2 Wave 1
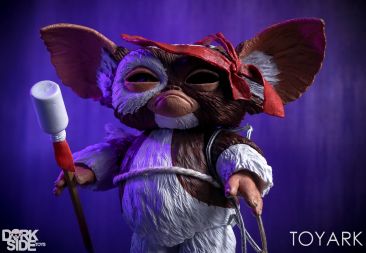 NECA Gremlins Ultimate Gizmo – Toyark Photo Shoot
 Premium Perfect Cell – S.H. Figuarts Dragonball Z Photo Review
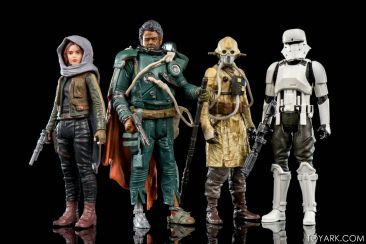 Star Wars Rogue One Jedha Revolt 4 Pack In-Hand Look
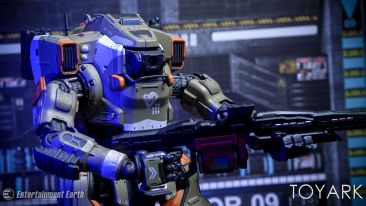 McFarlane Titanfall 2 BT-7274 Deluxe 10-Inch Figure – Toyark Photo Shoot
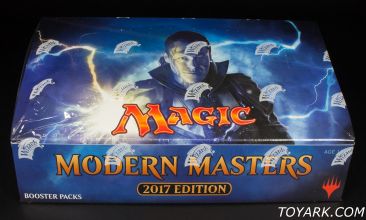
 Magic: The Gathering Modern Masters 2017 Photo Shoot
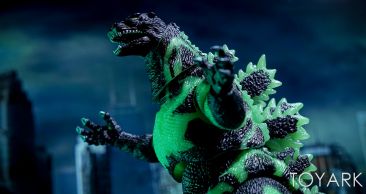 NECA Reactor Glow Godzilla – Toyark Photo Shoot
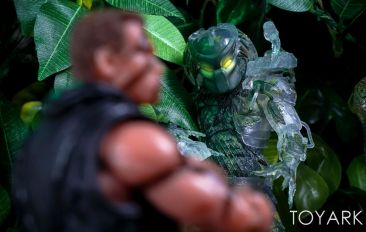
 NECA Predator 30th Anniversary Jungle Demon Predator – Toyark Photo Shoot
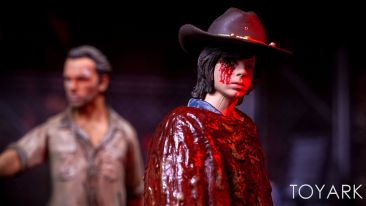 McFarlane Toys – The Walking Dead Carl Grimes Color Tops collection – Toyark Photo Shoot
 Visionaries Cindarr Darkling Lords Photo Shoot
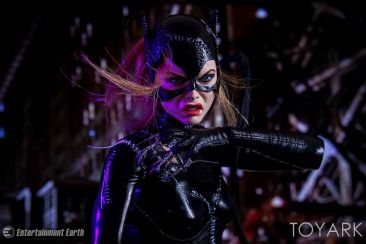 NECA Batman Returns Catwoman 1/4 Scale Figure – Toyark Photo Shoot
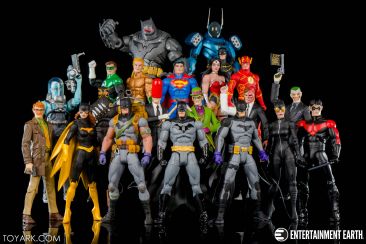 Superman, Aquaman & Green Lantern Capullo Designer Series Gallery
 NECA Aliens Colonial Marines 2-Pack – Toyark Photo Shoot
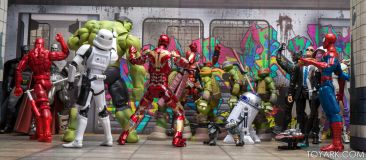 Extreme Sets Subway Terminal Pop Up Photo Review
 Boss Fight Studio – New Vitruvian H.A.C.K.S. & More at March NJCC!
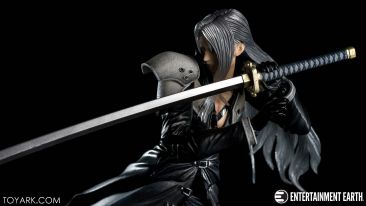 Sephiroth Play Arts Kai Final Fantasy Advent Children Photo Review
 Kidrobot 4-Inch Scale Foam Madballs – Toyark Photo Shoot
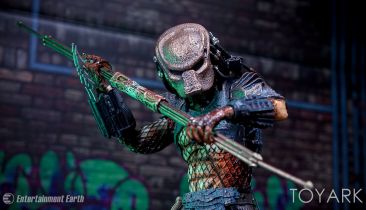
 NECA – Predator 2 Ultimate City Hunter Predator – Toyark Photo Shoot
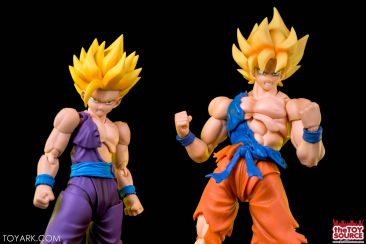 Battle Damaged Super Saiyan Gohan – S.H. Figuarts Dragonball Z Photo Review
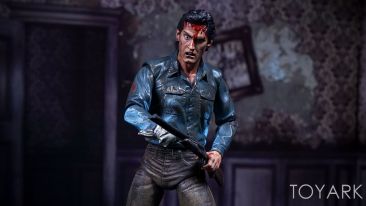 Extreme Sets – Abandoned House Pop-Up Diorama – Toyark Photo Shoot
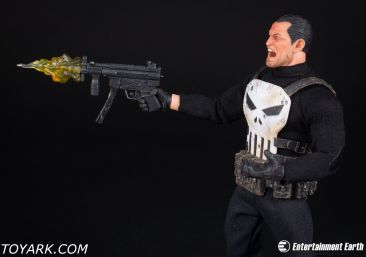 Punisher One:12 Collective by Mezco Photo Shoot
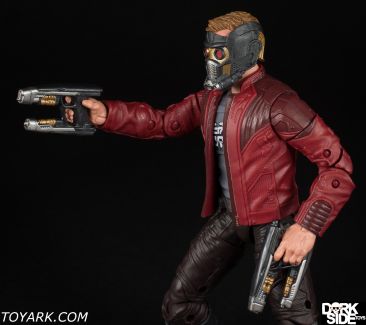
 Marvel Legends Guardians of the Galaxy: Vol. 2 Star-Lord and Titus BAF Photo Shoot
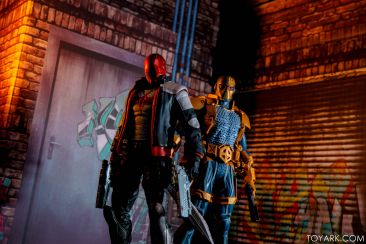 Extreme Sets The Building Pop Up Photo Review
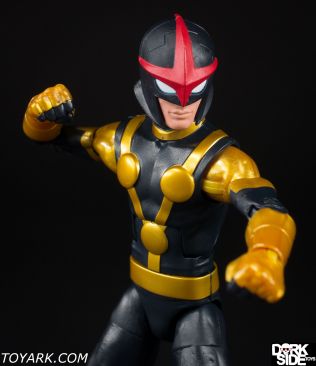
 Marvel Legends Guardians of the Galaxy: Vol. 2 Nova Photo Shoot
 Eaglemoss Aliens and Predator Statues – Toyark Photo Shoot
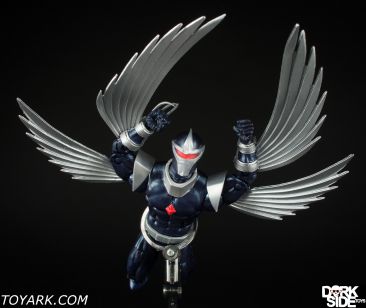
 Marvel Legends Guardians of the Galaxy: Vol. 2 Darkhawk Photo Shoot
 Batman Beyond DC Collectibles Animated Style 3 Pack Photo Review
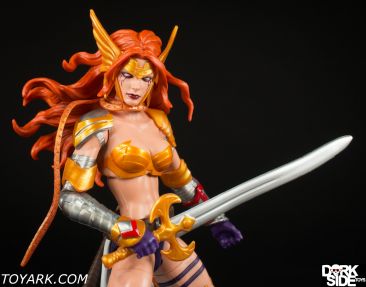
 Marvel Legends Guardians of the Galaxy: Vol. 2 Angela Photo Shoot
 Marvel Legends Guardians of the Galaxy: Vol. 2 Vance Astro Photo Shoot
 Star Wars 40th Anniversary Black Series Vintage Packaging – In-Hand Quick First Look
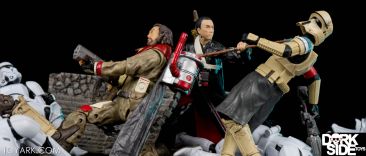
 Chirrut Imwe and Baze Malbus Star Wars Black Series Rogue One Galleries
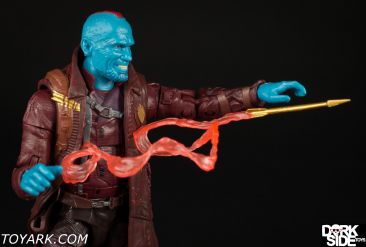 Marvel Legends Guardians of the Galaxy: Vol. 2 Yondu Photo Shoot
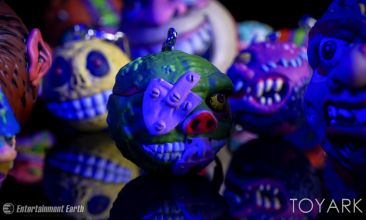 Kidrobot Madballs Keychains – Toyark Gallery
 Marvel Legends Guardians of the Galaxy: Vol. 2 Drax Photo Shoot
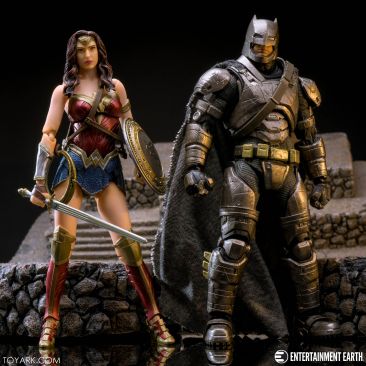 Mafex BVS Armored Batman and Wonder Woman Photo Review
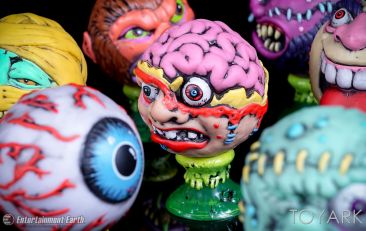
 Kidrobot Madballs Blind Box Mini-Figures – Toyark Photo Shoot
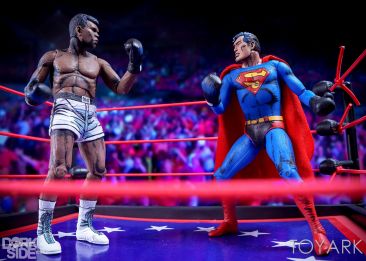 NECA Muhammad Ali vs Superman 2-Pack – Toyark Photo Shoot
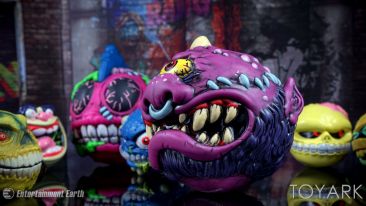 Kidrobot Madballs Horn Head and Bot Head 6-Inch Medium Figures – Toyark Photo Shoot
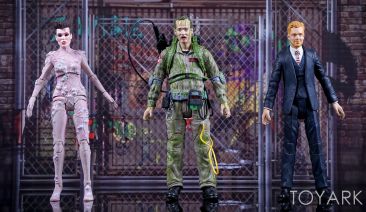
 Ghostbusters Select Series 4 – Toyark Photo Shoot
 S.H. Figuarts Suicide Squad Harley Quinn Photo Review
 Extreme Sets Sector 09 Pop-Up Diorama – Toyark Photo Shoot
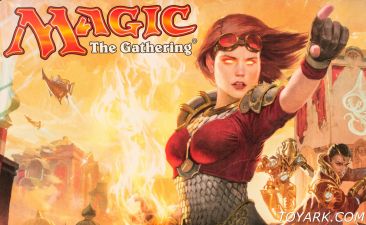 Magic: The Gathering Aether Revolt Bust A Box Photo Shoot
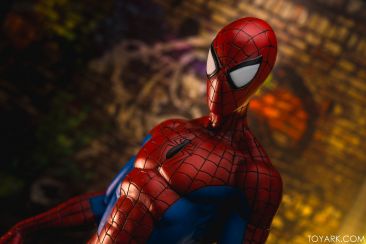 DST Marvel Gallery Spider-Man Photo Review
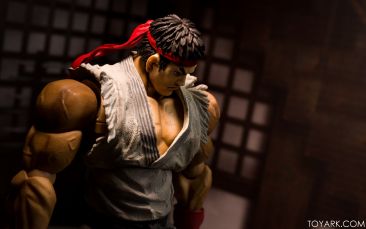 Extreme Sets Dojo Pop Up Photo Review
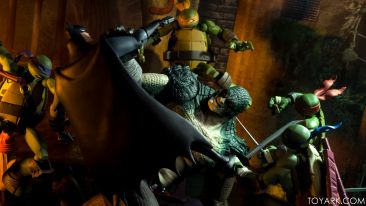 Extreme Sets Sewer Pop Up Photo Review
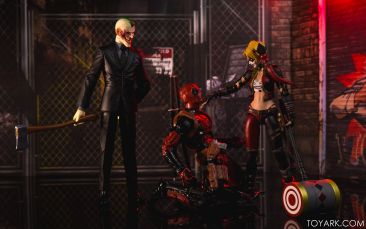 Extreme Sets Deranged Alleyway Pop-Up Photo Review
 Magic: The Gathering Commander 2016 Photo Shoot
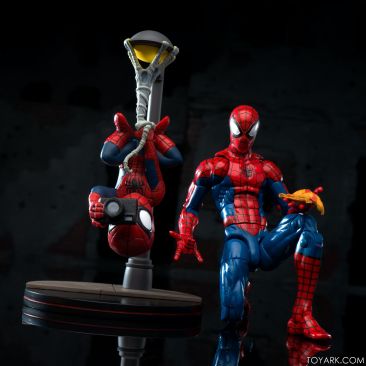 QMx Q-Fig Spider-Man Photo Review
 Madballs Series 1 by Just Play – Toyark Photo Shoot
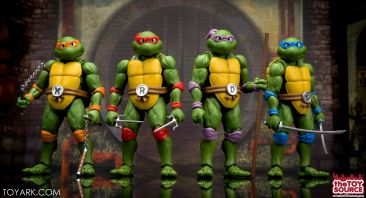 S.H. Figuarts TMNT Raphael and Michelangelo Photo Review
 Batman Returns – 1/4 Scale Mayoral Penguin – Toyark Photo Shoot
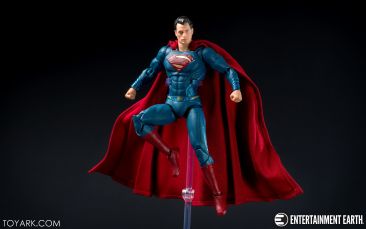 DC Films Superman Photo Review
 Disney Star Wars Director Krennic and Death Trooper Elite Premium Figures – Toyark Photo Shoot
 DC Films Armored Batman Photo Review
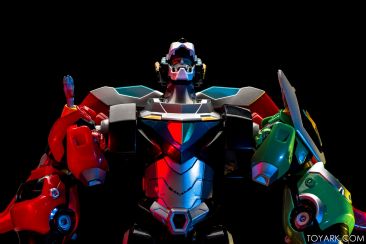 Voltron – Playmates Combinable Legendary Defender Photo Review
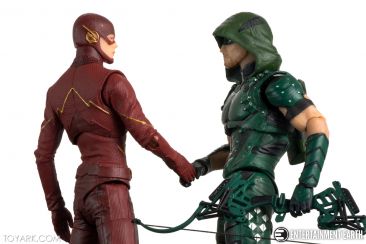 DC Collectibles Flash Arrow TV 2 Pack Photo Review
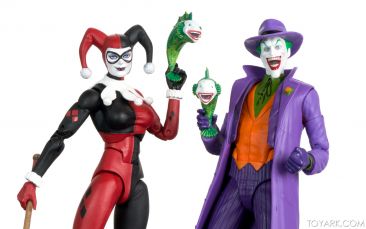 DC Icons Accessory Pack #1 Photo Review
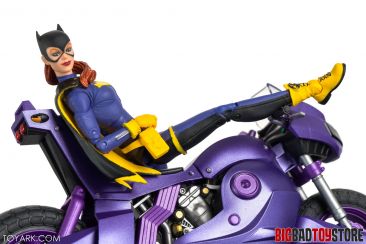 DC Icons Burnside Batgirl with Bike Photo Review
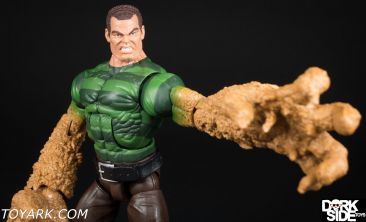 Marvel Legends Sandman BAF Photo Shoot
 DC Icons Darkseid and Grail 2 Pack Photo Review
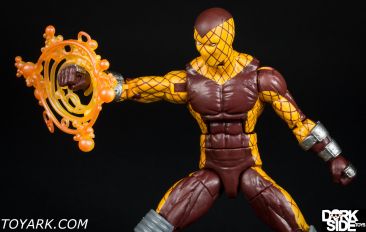 Marvel Legends Shocker Photo Shoot
 Star Wars Elite Premium Series Darth Vader and Kylo Ren -Toyark Photo Shoot
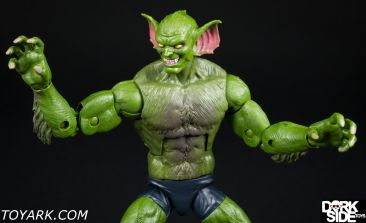
 Marvel Legends Jackal Photo Shoot
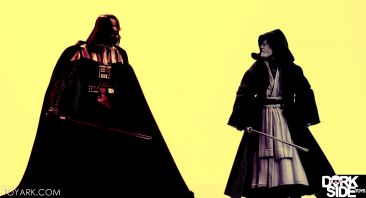 Obi-Wan Kenobi – Star Wars Black Series Gallery
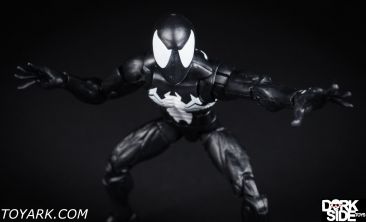 Marvel Legends The Amazing Spider-Man Symbiote Photo Shoot
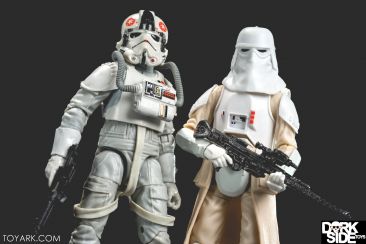 AT-AT Pilot and Snowtrooper – Star Wars Black Series Gallery
 Sabine Wren – Star Wars Black Series Gallery
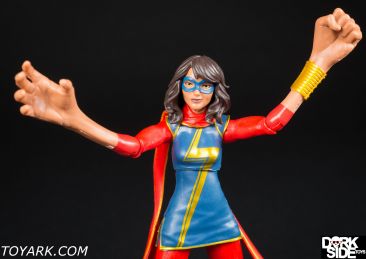 Marvel Legends Ms. Marvel Photo Shoot
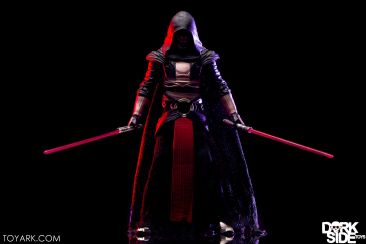 Darth Revan – Star Wars Black Series Gallery
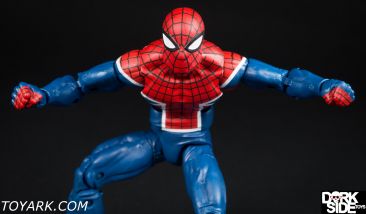 Marvel Legends Spider-UK Photo Shoot
 Princess Leia Organa – Star Wars Black Series Gallery
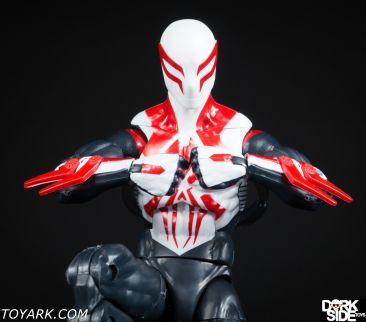
 Marvel Legends Spider-Man 2099 Photo Shoot
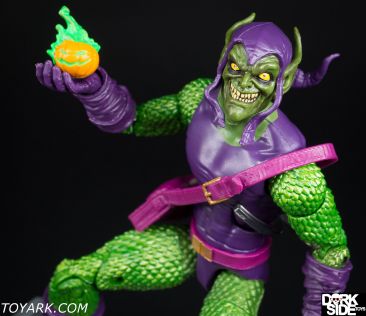
 Marvel Legends Green Goblin Photo Shoot
CompaniesHasbroNECADiamond Select ToysTamashii NationsMattelMcFarlaneMezcoDC CollectiblesSquare EnixLEGOStorm CollectiblesBluefinBoss Fight StudioChronicle CollectiblesGeccoToyfinity ToysBlitzwayDisneyEaglemoss Hero CollectorEnterbayKidrobotExtreme SetsJust Play